Component Communication and State Management in Vue.js
One common problem when developing an application with a modern framework is where to keep the state and how do you share it across…
Component Communication and State Management in Vue.js
One common problem when scaling an application with a modern framework is how do you handle the state and how do you share it across different components when needed.
There are currently 3 established patterns to solve this in Vue.js and you should choose one based on how complex your component architecture is. Let’s examine these options.
Props & Events
Passing props down and emit events up from one component to another. Let’s see the simple example of having two components that need to communicate.
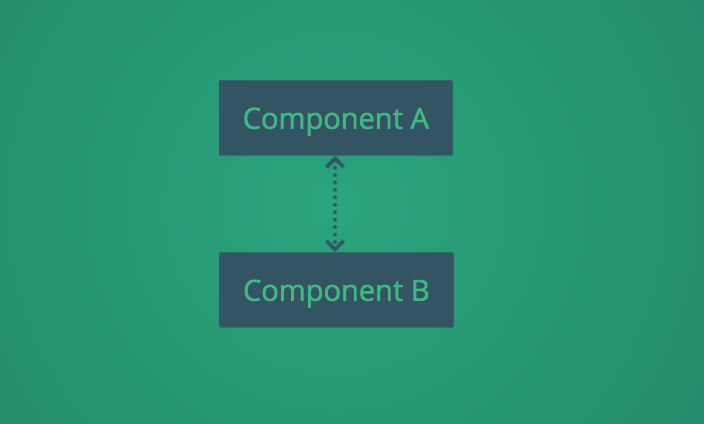
The Vue.js way of doing this is passing a prop from component A to component B and emitting an event from component B.
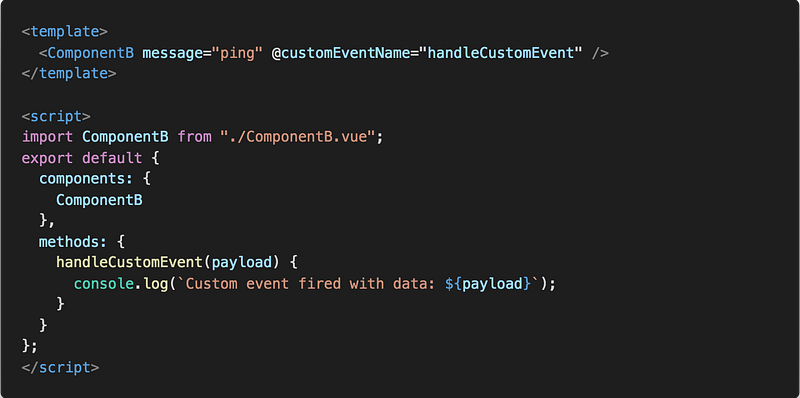
Component A
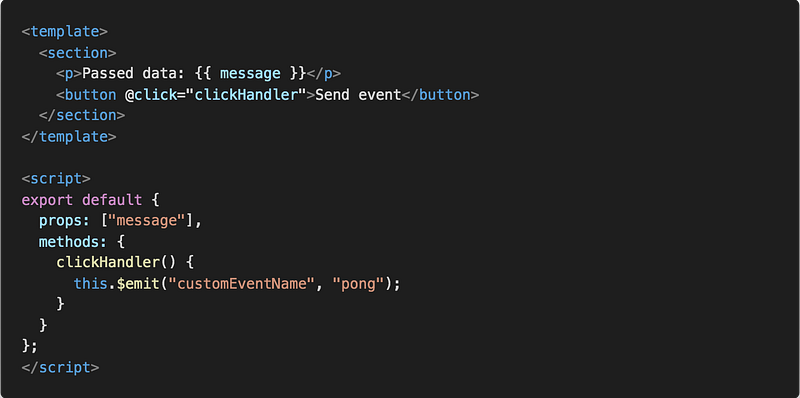
Component B
So far so good. This is probably the cleanest and most performant way of doing this. But sooner or later our application will grow larger and more components will be added. Let’s examine the scenario below.
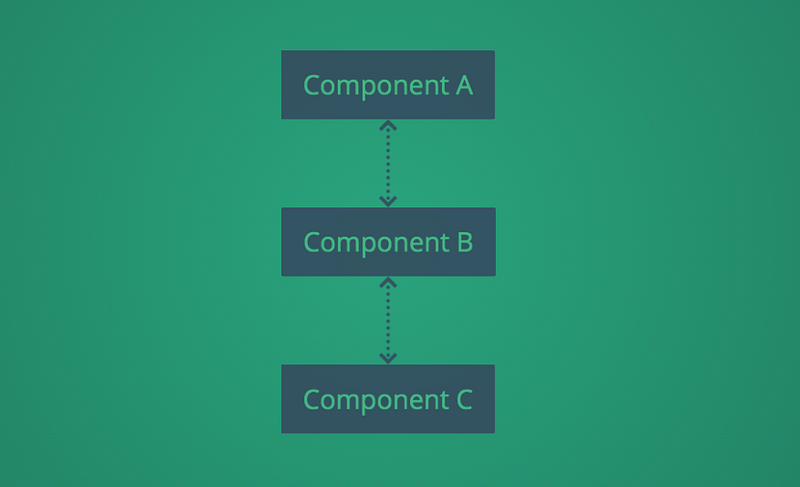
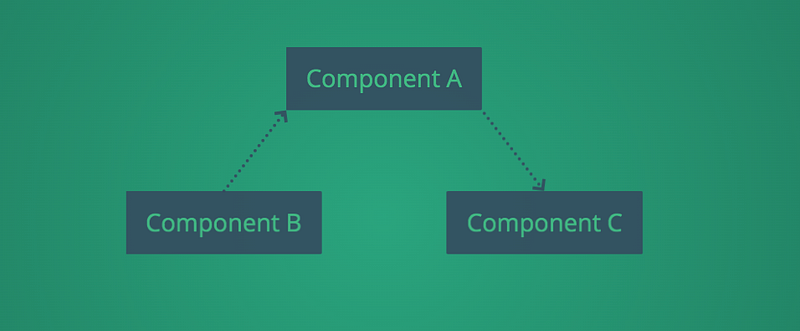
Component A and C that need to communicate remain the same but Component B that happens to be between them needs to carry the prop or event.
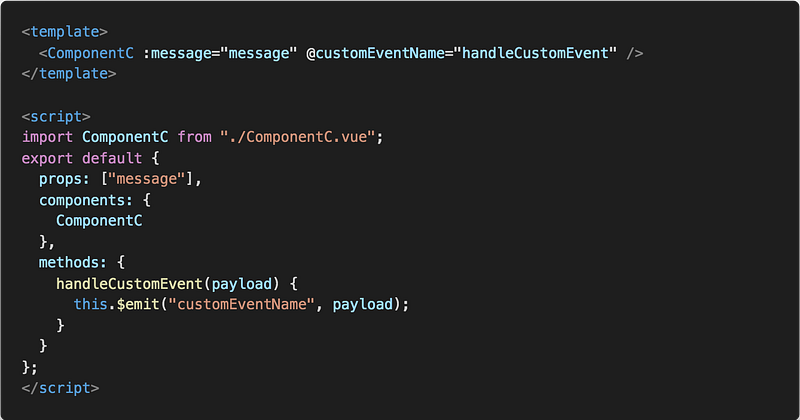
Component B
We only have three components and we have already added several lines of code to a component just because it happened to be between two components that needed to communicate.
Things are event worst when two siblings need to communicate. They need to do this using an ancestor which will receive the emitted event and pass it to the receiver with a prop.
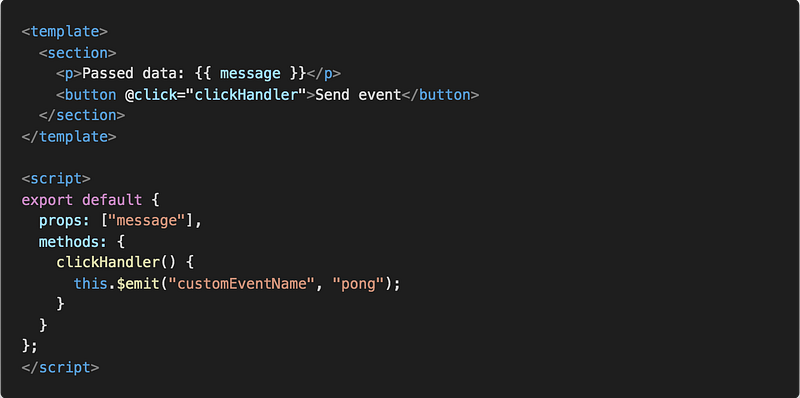
Component B emits the event
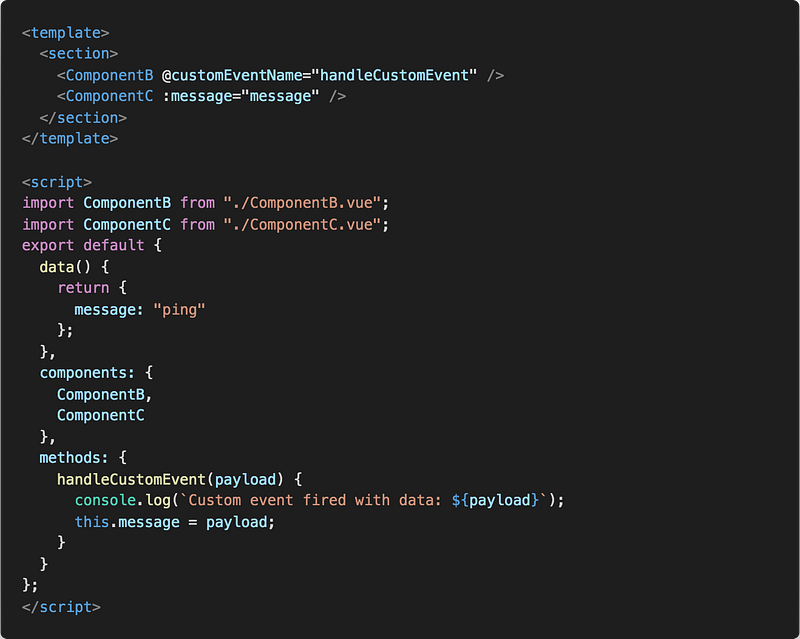
Component A listens to the event and passes changed the prop
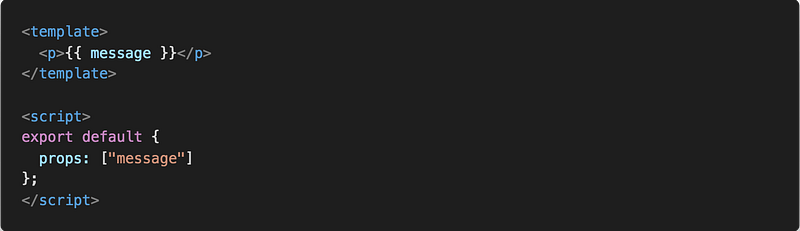
Component C gets updated prop
If you have a decent amount of components in your app you will soon have a common problem called Prop drilling with many components getting data that they don’t need just to forward them down the component tree.
The problem is even bigger when the components are siblings which means a combination of props and emit is needed for them to communicate. And what happens if one component changes place in the DOM? Then a refactor in all the components between them is needed.
This can easily get out of hand that’s why an event-driven architecture is most common.
Event Bus
Another solution that doesn’t rely on the component position in the DOM is using an event bus.
An event bus implements the publisher/subscriber pattern. It can be used to decouple the components of an application so that a component can react to events fired from another component without them having direct dependencies with each other. They only need to know the event bus.
Every subscriber can subscribe to a specific event. A subscriber will be notified when the event it subscribes to is published on the event bus. A publisher can publish events on the event bus when something happens.
Conveniently you can use a Vue instance for this. After importing Vue you can use it to listen and emit events like this:

Event bus initialization
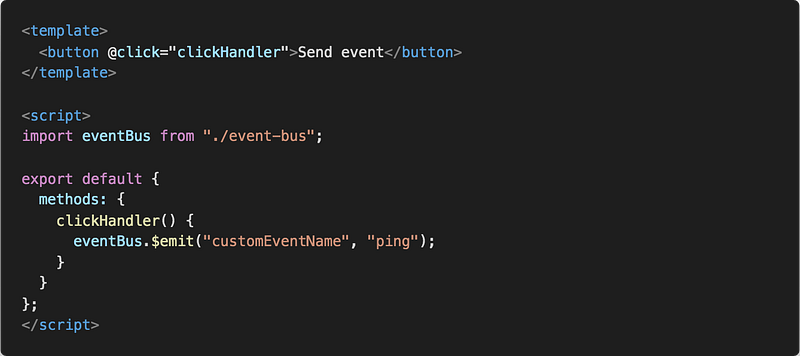
A component that emits the event
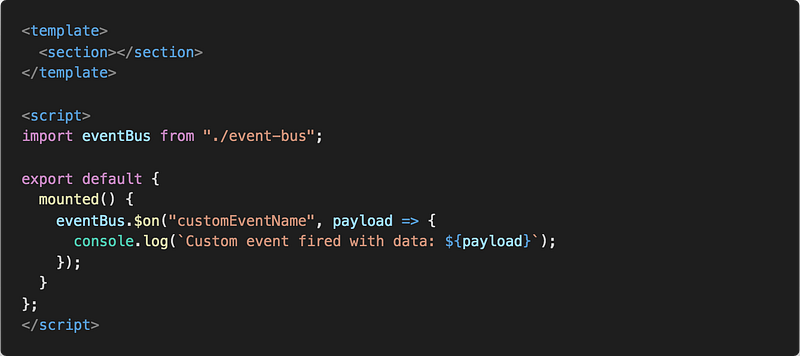
A component that listens and reacts to the event
Using an event bus has the benefit of cleaner component architecture but in a large application is hard to track state changes because it’s not always obvious how the state was changed and which components reacted to that. In addition, we are using events to sync the state between components and we don’t have a centralized state.
State management Library (Vuex)
The third option and the one most commonly used with Vue is using the official Vuex library. Vuex is highly inspired by the flux methodology which redux also uses. It adds structure on how state changes, simplifies monitoring and enables features like time-travel and performance benchmarking. It serves as a centralized store for all the components in an application, with rules ensuring that the state can only be mutated in a predictable fashion.
In simple words, Vuex state is a global singleton object that every component can read or trigger actions to change it.
By defining and separating the concepts involved in state management and enforcing rules that maintain independence between views and states, we give our code more structure and maintainability.
Creating a Vuex Store
There are four components in every Vuex Store. State, Mutations, Actions, and Getters.
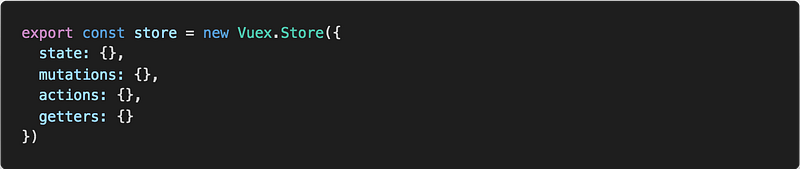
Store
State
Simply put State is a Javascript object that holds all the application data that needs to be shared across different components.

State
The main difference between the Vuex state and a simple javascript object is that the Vuex state is reactive and that you should not directly change this object. You have to do this through mutations.
Mutations
Mutations are simple functions that accept as first parameter the state and its the only way you should change the state.
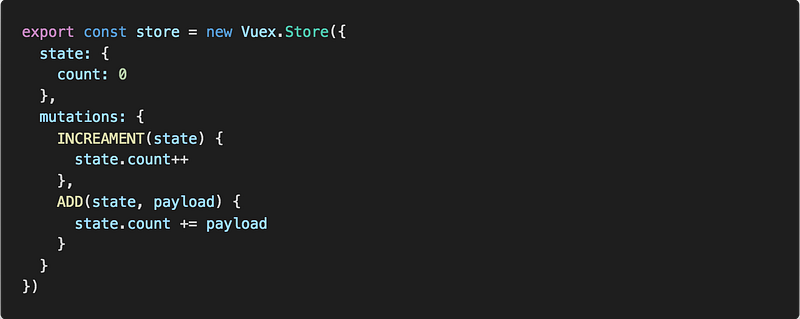
Mutations
To invoke a mutation handler, you need to call store.commit

One important rule to remember is that mutation must be synchronous
Actions
When complex or asynchronous logic is required we shouldn’t do this inside a mutation. That’s why actions exist. Actions are very similar to Mutations with the difference that they can’t directly change the state and that you can have any type of asynchronous logic in them.
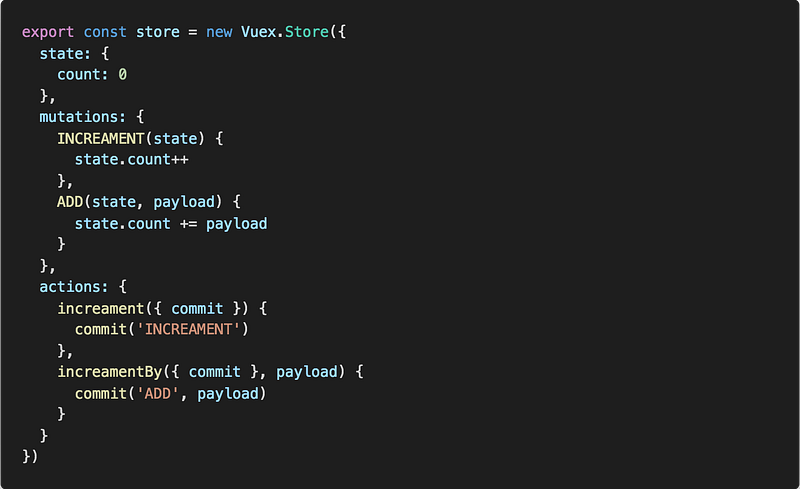
Actions
Actions can be dispatched from components or other actions like this

Getters
Sometimes you will need to manipulate the state. Components solve this problem with computed properties. Vuex getters work exactly the same. You can combine multiple state values or manipulate the data before sending the values to the component.
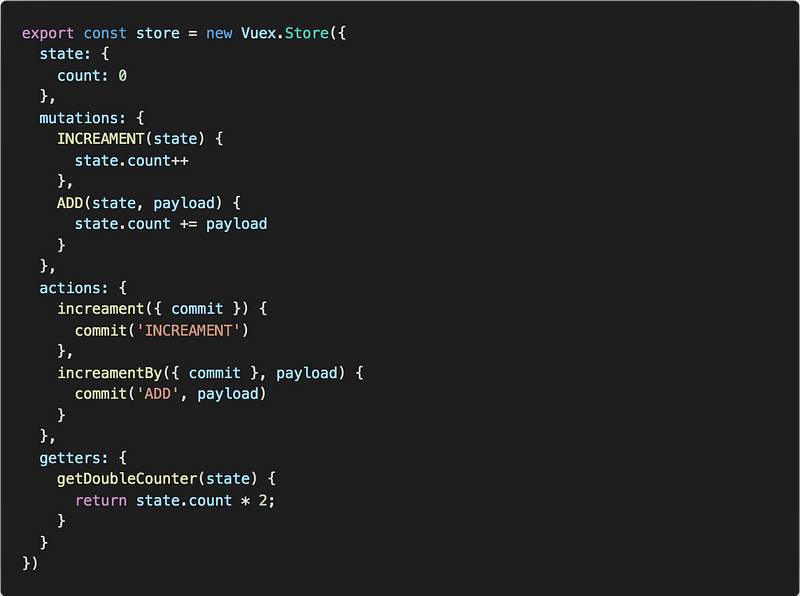
Getters
Modules
Due to using a single state tree, all state of our application is contained inside one big object. However, as our application grows in scale, the store can get really bloated.
To help with that, Vuex allows us to divide our store into modules. Each module can contain its own state, mutations, actions, getters, and even nested modules.
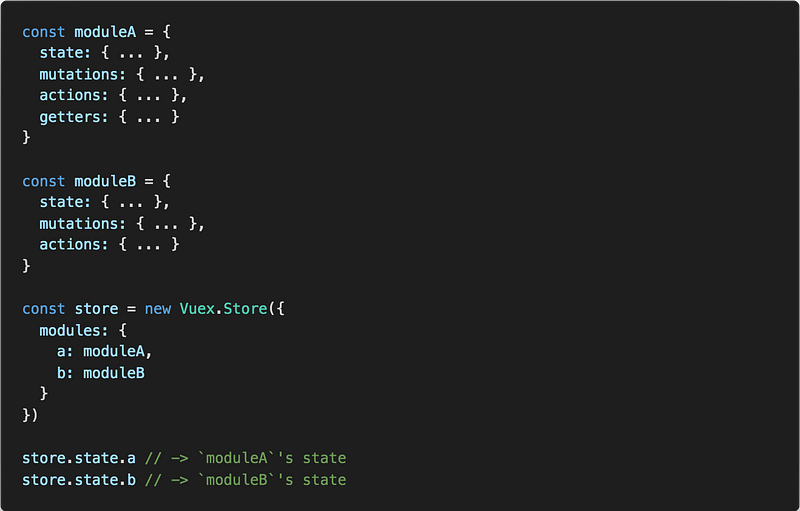
Modules declaration
Each module has its own local state but can have access to other module’s state through globalState and globalGetters that are part of the context passed automatically in every action or getter function. And of course, they can dispatch actions to other modules as well.
Namespacing
By default, actions, mutations, and getters inside modules are still registered under the global namespace. This allows multiple modules to react to the same mutation/action type.
If you want your modules to be more self-contained or reusable, you can mark it as namespaced with namespaced: true When the module is registered, all of its getters, actions, and mutations will be automatically namespaced based on the path the module is registered at.
Conclusion
Three different approaches for state management and the one you should use really depends on the scale of your application. Vuex is probably the most solid but adds boilerplate that might be unnecessary in small applications. So start with the simplest one and move to a more complex, once your application grows.
One important takeaway is that using one of the techniques above doesn’t necessarily prevent you from using the others in the same application. You can still pass data as props to a component if you don’t expect your hierarchy to change or an event bus for a stateless event-driven workflow. Know your tools and use them in your favor.
Additional resources:
- Component props and custom events
- Creating a Global Event Bus with Vue.js
- Vuex official Documentation
- All code samples of this article can be found on GitHub